

We needed local tunnels again. Someone on the team wants to hand a client a URL that reaches their laptop for a demo, or a webhook provider needs a callback address that reaches a service that is not exposed to the public internet. Small problem, and every developer tool solves it. The trouble starts when you want more than one person using it.
The paid wall and the walled garden
ngrok is the default answer, and it is a good product. But team features, including SSO, sit behind a paid tier. The cost itself is minor. What we did not want is our access control living in someone else’s billing plan rather than in our own identity provider.
Cloudflare Tunnel is free and solves the SSO problem differently, but it only works inside Cloudflare’s Zero-Trust access model. Your domains have to sit behind Cloudflare, your policies live in their dashboard, and your identity provider integrates through their Access product. That is a reasonable tradeoff for a lot of teams. It was not the one we wanted, because it makes Cloudflare a permanent dependency for something as small as “expose a dev server.”
Tailscale Funnel is worth a mention too. It piggybacks on your Tailscale network, which is elegant if you are already on Tailscale, and identity comes from your Tailscale ACLs rather than a separate login. SSH-based tools like sish and bore are the other end of the spectrum: minimal, self-hosted, no vendor at all, but also no notion of per-user policy beyond what you bolt on with SSH keys and firewall rules.
| Option | Self-hosted | Team SSO | Authorization model |
|---|---|---|---|
| ngrok | No | Paid tier only | Fixed, ngrok’s dashboard |
| Cloudflare Tunnel | No | Free | Cloudflare Zero-Trust policies |
| Tailscale Funnel | No | Via Tailscale | Tailscale ACLs |
| sish / bore | Yes | No | None, bring your own |
| frp + our CEL plugin | Yes | Yes, your IdP | Arbitrary CEL rules |
None of these are wrong. We just wanted something fully self-hosted, backed by our own identity provider, with authorization rules we could write and change ourselves. That led us to frp.
frp: a solid reverse proxy with an authentication gap
A fast reverse proxy to help you expose a local server behind a NAT or firewall to the internet.
frp (fatedier/frp) is a self-hosted TCP/UDP/HTTP/HTTPS reverse proxy under the Apache-2.0 license, and a well-established one. You run frps on a public server, frpc on the machine behind NAT, and frpc registers proxies with frps over a persistent connection. It is mature, fast, and does exactly what a tunnel tool should do.
frp also supports OIDC out of the box. Point frpc at your identity provider, and it authenticates using the OAuth Client Credentials grant: machine to machine, no user in the loop. frps then validates the token’s issuer and audience against what it expects. That is real authentication, and it is enough if every client is a service account.
It authenticates, but it does not authorize. Once a client is authenticated, frp’s OIDC support has nothing more to say about it. Any authenticated client can claim any custom domain, any proxy name, any amount of bandwidth. frp answers “is this a valid client,” and stops there. It has no opinion on what a given proxy is allowed to claim. Those are different questions, and once you are running tunnels for more than a one-off demo, the second one matters as much as the first.
The plugin: CEL rules over Login and NewProxy
💫 fatedier/frp server plugin for authorization with custom expressions
So we built a server-side policy engine for frp. It runs as a sidecar HTTP service next to frps and hooks into frp’s server plugin operations, specifically Login and NewProxy. Every time a client logs in or registers a proxy, frps calls out to the plugin, and the plugin decides whether the request goes through.
Rules are written in CEL, the Common Expression Language used in Kubernetes admission control and plenty of other policy systems. Each rule sees two variables: op, the operation name, and content, the request body as a map. Rules evaluate in order, first match wins, and the matching rule’s action runs: allow, reject, or rewrite. A rewrite uses content.with(), which merges new fields into the request without clearing anything that was already there, so a rule can add or override a single field and leave the rest of the payload intact.
Wiring it into frps is a few lines of TOML:
[[httpPlugins]]name = "frp-cel-plugin"addr = "127.0.0.1:9001"path = "/handler"ops = ["Login", "NewProxy"]A rule restricting which custom domains a proxy can claim:
- name: restrict-custom-domains ops: [NewProxy] when: | has(content.custom_domains) && !content.custom_domains.all(d, d.endsWith(".tunnels.example.com")) action: reject reason: "custom_domains must be under *.tunnels.example.com"And one that puts a default ceiling on bandwidth when a proxy does not set its own:
- name: default-bandwidth-cap ops: [NewProxy] when: | !has(content.bandwidth_limit) || content.bandwidth_limit == "" action: rewrite set: bandwidth_limit: "2MB" reason: "proxies default to a 2MB/s cap unless one is set explicitly"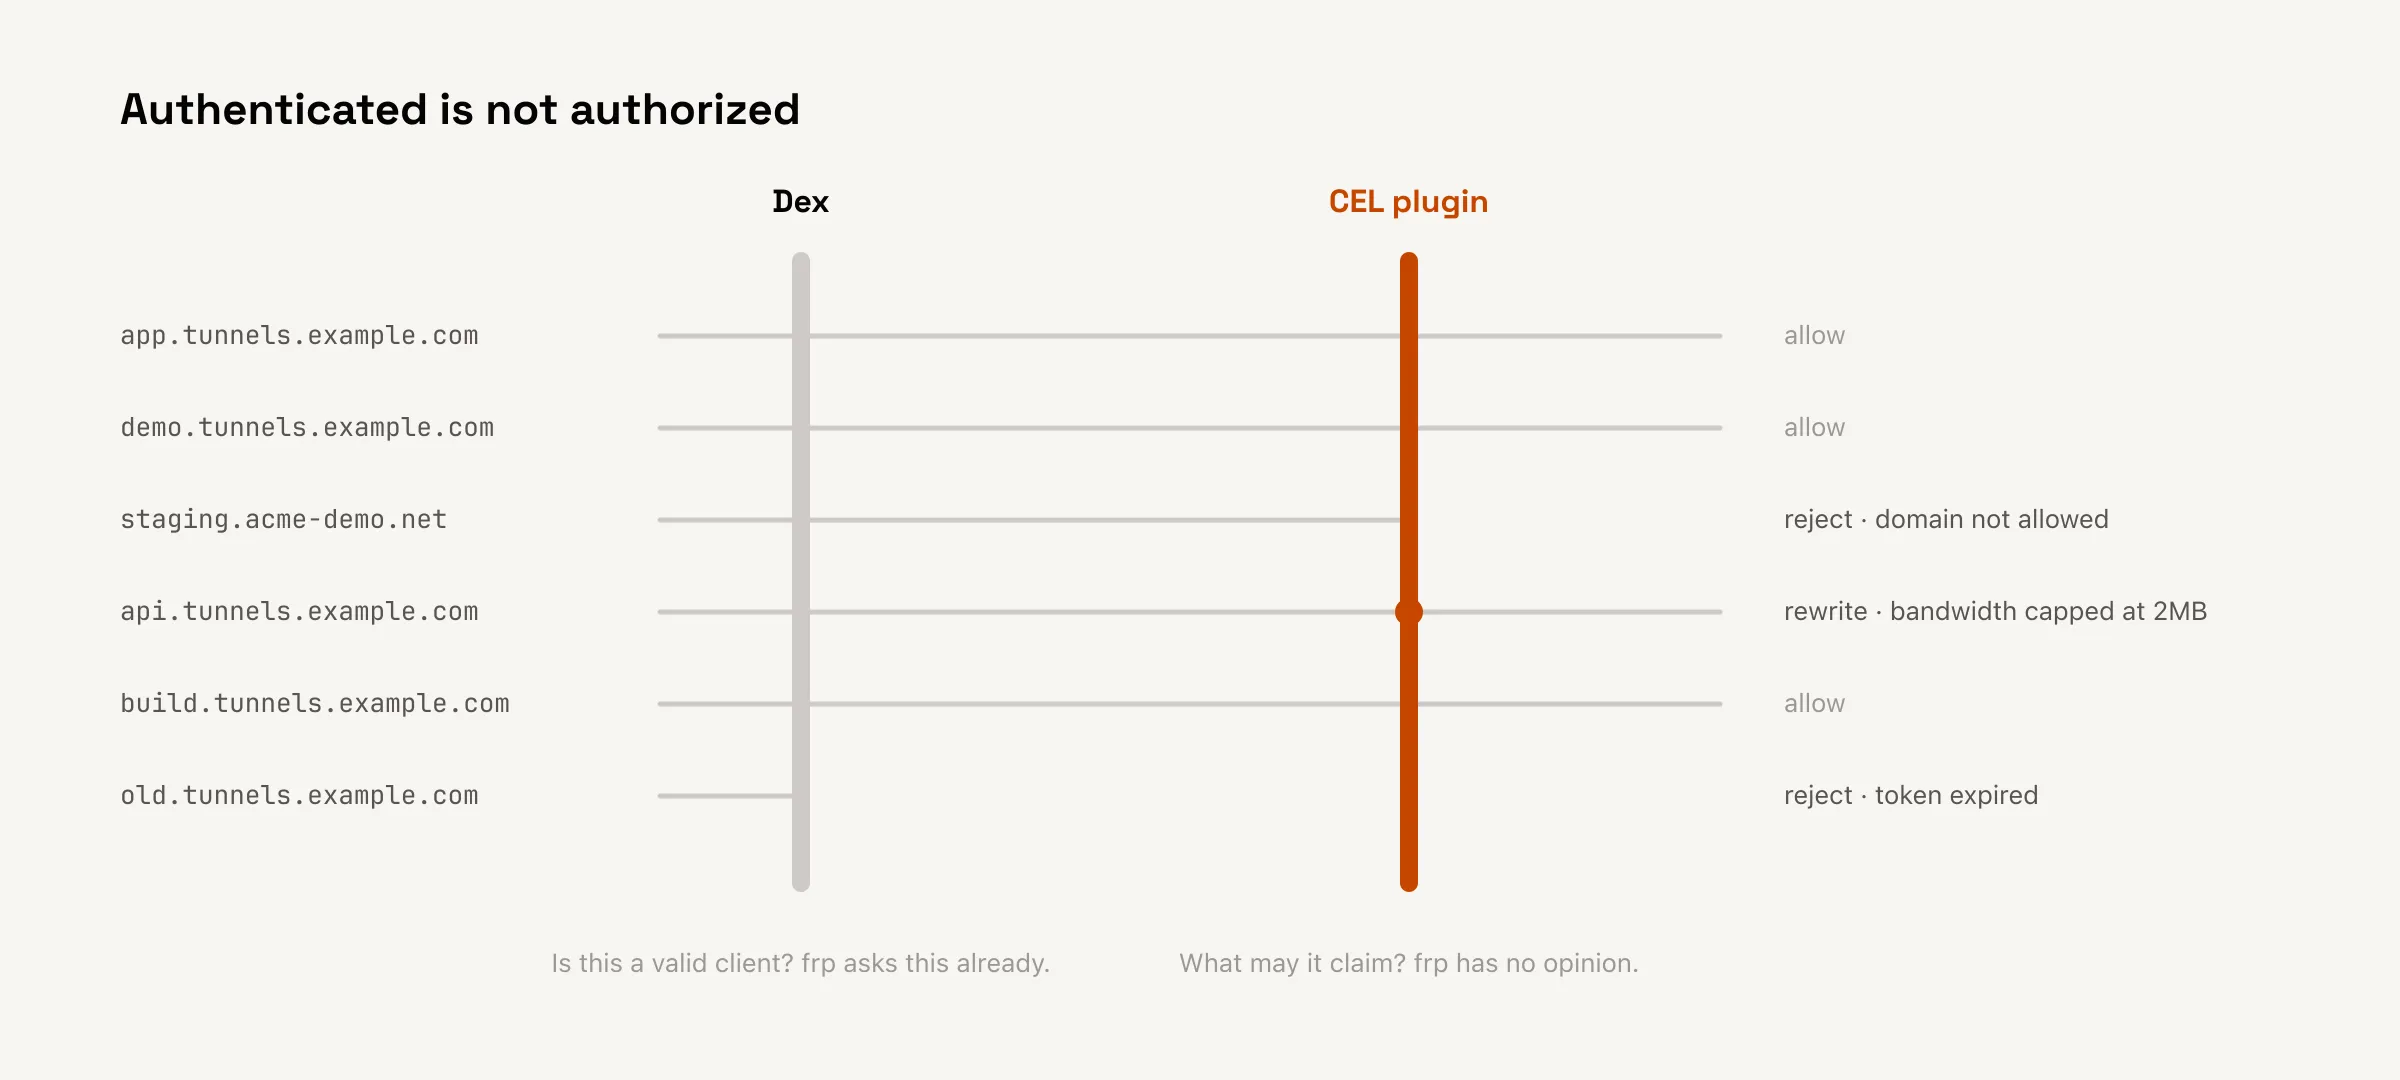
Where the token comes from
frp verifies the token against the identity provider, and that verification is the authentication. So the client has to present a real token. Rather than baking a static client secret into every laptop’s frpc config, a developer gets that token from oidc-token-cli, the CLI we covered in the earlier post, which authenticates against our Dex IdP and hands frpc a token to present. frps verifies it against Dex, and only then does the connection come up.
Token acquisition, verification, and proxy authorization
sequenceDiagram
  participant User
  participant CLI as oidc-token-cli
  participant Dex as Dex IdP
  participant frpc
  participant frps
  participant Plugin as CEL plugin

  User->>CLI: run oidc-token-cli
  CLI->>Dex: OIDC login
  Dex-->>CLI: token
  CLI-->>User: token stored
  User->>frpc: start tunnel
  frpc->>frps: Login (token)
  frps->>Dex: verify token
  Dex-->>frps: valid
  frpc->>frps: NewProxy (custom_domains, ...)
  frps->>Plugin: evaluate NewProxy
  Plugin-->>frps: allow or reject
  frps-->>frpc: proxy established or rejected
Authentication and authorization stay separate. Dex verifies the token, so frps knows the connection is from a valid client. The CEL plugin then decides what that connection’s proxies may claim: which domains, how much bandwidth, which names. Swap Dex for another IdP, or oidc-token-cli for any other tool that can produce a valid token, and the rest of the chain does not change.
We used the same split, an IdP-verified token plus a CEL policy layer deciding what the caller may actually do, in gh-token-broker, another place where “authenticated” and “authorized” needed to be separate questions.
Appendix: running the plugin
The plugin runs as a sidecar, not embedded in frps. We deploy it as its own container next to frps, reachable only on localhost or an internal network, never exposed publicly. That keeps the policy engine’s failure modes separate from the proxy’s, and lets us update rules and redeploy the plugin without touching frps itself.
It exposes /healthz for a plain liveness check, which is what our Kubernetes readiness and liveness probes hit. If the plugin pod is not answering, frps has nothing to evaluate Login or NewProxy against, so we want the orchestrator to notice quickly and restart it rather than let requests queue against a dead sidecar.
That tradeoff means a bug in a reject rule shows up immediately as “my tunnel stopped working,” which is annoying but safe. A bug in an allow rule can silently narrow access rather than widen it. We would rather debug an angry Slack message than an access log we did not know we needed to check.
Closing the loop
None of this required trusting a vendor with our access policy. frp does the proxying, Dex does the authentication by way of oidc-token-cli, and our own CEL rules do the authorization. If our requirements change, whether that means a new IdP, a new rule about which proxies may claim a wildcard domain, or a tighter default on bandwidth, we edit a YAML file and redeploy a sidecar. That is the whole point of self-hosting the tunnel in the first place.
If you have not read it yet, the earlier post covers oidc-token-cli, the tool that gets a token out of Dex in the first place.